Basic Sourdough Bread: A Labor of Love (And Yeast)
Sourdough Bread: A Labor of Love (And Yeast)
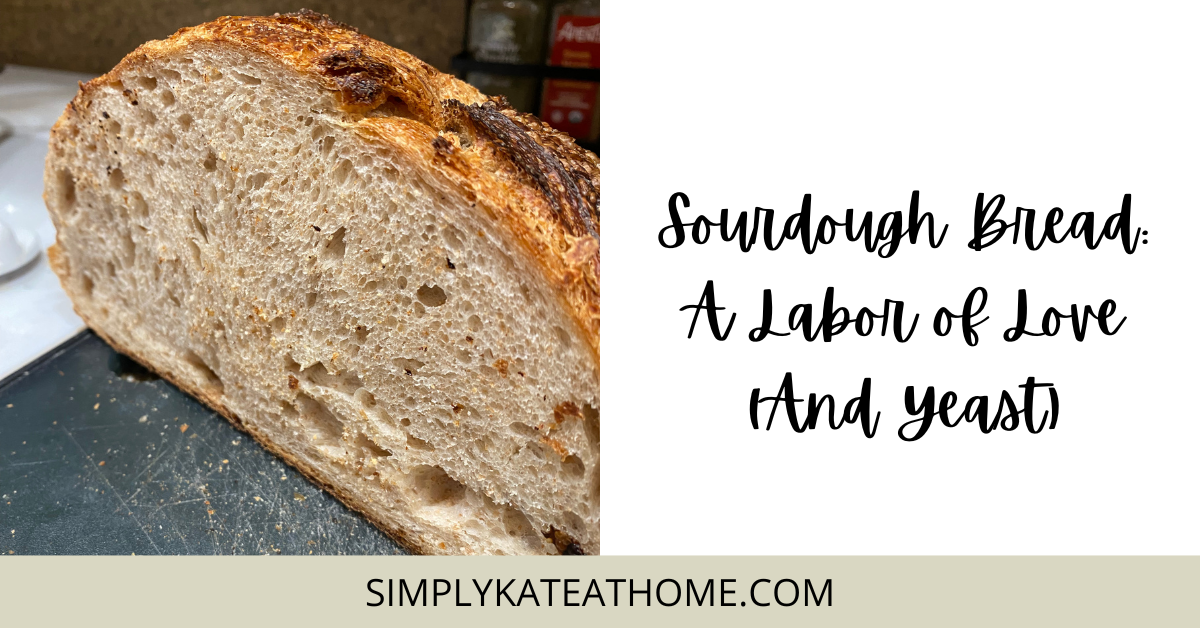
Baking bread is one of those activities that seems simple in theory but can be surprisingly complex in practice. And when it comes to sourdough bread, that complexity is multiplied tenfold. But let me tell you, the reward of biting into a warm, crusty loaf that you made yourself is worth all the time, effort, and patience that goes into it.
For those unfamiliar, sourdough bread is made using a mixture of flour, water, and wild yeast to create a “starter”. This starter is then used in place of commercial yeast to ferment the dough and create that distinct, tangy flavor that sourdough is known for.
So, why bother with sourdough when there are plenty of easy-to-use, reliable commercial yeasts available? Well, for starters (no pun intended), sourdough has a depth of flavor that can’t be beat. The wild yeast and bacteria in the starter interact with the flour in a way that creates a flavor that’s nutty, tangy, and a little bit sour. It’s a flavor that can’t be replicated with commercial yeast alone.
And then there’s the health aspect. Many people who have trouble digesting commercial yeast find that sourdough is much easier on their digestive system. This is because the long fermentation process that sourdough goes through breaks down the gluten and makes it easier to digest.
Now, I know what you’re thinking: “This all sounds great, but making sourdough bread is just too complicated.” And I’ll admit, there is a bit of a learning curve.
But the good news is that once you get the hang of it, making sourdough bread is actually quite simple.
And the best part? You don’t need any fancy equipment or ingredients to get started. All you need is flour, water, a bowl, and some patience.
Here’s a basic sourdough starter recipe to get you started:
Ingredients:
- 75g flour
- 75g water
Instructions:
Mix together 75g of flour and 75g of water in a mason jar until it is well mixed.
Cover the jar with a clean towel or plastic wrap and let it sit at room temperature for 24 hours.
Measure out 75g of the mixture, and add 75g water and 75g flour. Mix well. Let it sit for 24 hours somewhere safe and warm (like the top of your fridge).
You should start to see bubbles forming on the surface of the dough. This is a good sign that your yeast is starting to become active. If not, don’t worry! Keep discarding (removing) 75g of the mixture, and adding in 75g water and 75g flour every day for a week.
Wondering what to do with your discard? Check this article out.
By this point, your starter should be active and ready to use. A mature, dependable starter takes about 6 months to build in strength, but your starter can absolutely be used before then.
Now that you have your starter, it’s time to make bread! Here’s a basic recipe for sourdough bread:
Basic Sourdough Bread Recipe
Sourdough Bread Ingredients:
- 100g sourdough starter
- 500g bread flour (AP flour or whole wheat can be used, too)
- 350g warm water
- 12g salt
Sourdough Bread Instructions:
In a large bowl, mix together 100g of sourdough starter, 500g of flour, 350g of warm water, and 12g of salt (if using).
Knead the dough for 10-15 minutes until it becomes smooth and elastic.
Place the dough in a clean bowl and cover it with a clean towel or plastic wrap for 1 hour.
Perform a set of stretch and folds, rotating the bowl 90 degrees with each fold.
Rest 30 minutes.
Perform 3 more sets of stretch and folds, every half hour, for two hours total. (4 sets total).
Bulk Fermentation
After you’ve completed your stretch and folds, let it rise for several hours, or until it has just doubled in size. A straight sided vessel is great for this, but your bowl will do just fine!
Shaping
Preheat your oven to 450°F (230°C) with a Dutch oven or heavy pot with a lid inside.
Lightly flour your work surface and carefully dump the bubbly dough onto the counter. Gently work the dough into a rough square shape.
I’m not even going to try and describe how to shape sourdough, so go watch this video for a great tutorial on shaping!
Once you’ve done the first shaping, let it rest on the bench for 30 minutes. Shape again (as described in the video above) and place into a floured banneton or bowl to allow for the last rising period of 30 minutes to 1 hour.
Turn the dough out onto parchment paper.
Baking
Carefully remove the hot Dutch oven or pot from the oven and place the shaped dough on parchment paper into it. Score with an X.
Place the lid on the pot and return it to the oven.
Bake for 30 minutes with the lid on, then remove the lid and bake for an additional 15-20 minutes, or until the crust is golden brown.
Let the bread cool completely on a wire rack before slicing and serving.
And there you have it! Homemade sourdough bread, made with just a few simple ingredients and a little bit of patience. Of course, this is just a basic recipe and there are countless variations you can try as you get more confident in your sourdough baking skills.
Making sourdough bread may seem intimidating at first, but with a little bit of practice and patience, anyone can do it. And the reward of biting into a warm, crusty loaf that you made yourself is truly worth it. So grab your flour and water, and get started on your sourdough journey today!