Make Better Sourdough: 5 Tips
Make Better Sourdough: 5 Tips
If you’re here, you’re probably wondering how to make better sourdough. Settle in, friend, I’ve got some answers.
I’ll go ahead and assume a few things about you: you understand the basics about sourdough and the process, you’ve probably had a couple of good loaves (maybe even a few kick butt ones), you’ve got a feisty starter rock n’ rolling, and maybe you’ve ventured out into adding herbs or *drool* jalapeno and cheddar cheese to your repertoire. Sound about right?
(If you need a refresher on your starter, head here.)
But, if you’re anything like me, you know there’s likely a tip just around the corner that will take your sourdough to the next level.
I’ve had plenty of loaves completely flop over the years–trust me, it’s inevitable. Fortunately for you, you can benefit from my failure here. I’ve got five tips for taking your loaf to the next level and make better sourdough.
Let’s get to it.
Note: Simply Kate At Home is reader-supported. When you buy through links on our site, we may earn an affiliate commission. You do not pay a higher price. This blog post probably contains affiliate links. As an Amazon Associate, I earn from qualifying purchases.

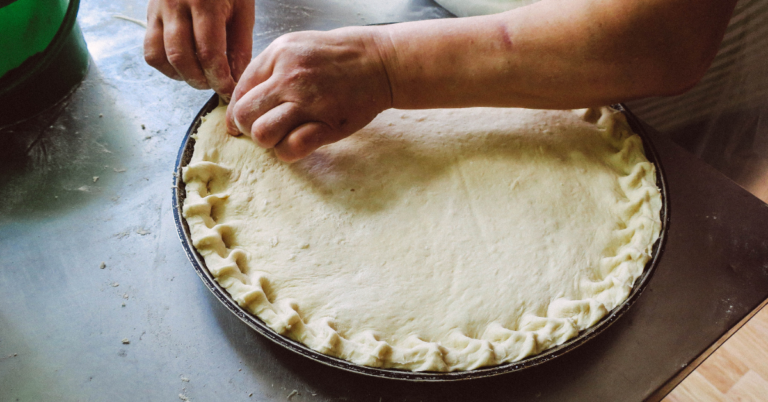
1. Banneton Baskets
Back when I started really digging into sourdough as more than just a casual hobby (pre-c-word, I might add), I realized that my mixing bowl wasn’t exactly up to snuff when it came to shaping. Yes, I literally would clean out my mixing bowl, dust a dish towel with flour, and plop that sucker back in. It worked, I guess.
Adding a banneton basket to my tools was critical in helping with the second rise of my loaves, thus, better sourdough. The banneton gives it the structure it needs for the second rise, and without it, my loaves seemed to flatten out resulting in… disks.
So, take a look around your local thrift shop or find one on Amazon–either way, your dough will thank you for it.
2. Cold Ferment
So many people skip this step, and I cannot wrap my head around why. I’ve heard that it’s “too much work” for this one, piddly extra step. Well, my friend, I’m here to argue that it is in fact, the opposite of “too much work”.
Placing your dough, lovingly, into the refrigerator is indeed the laziest thing you could do with your dough for 8-12 hours. Pop it in there with a damp dishtowel overtop, forget about it overnight (I’ve left it several nights before… oops), and bake it from cold the next morning.
I find that cold-fermented sourdough has this extra tasty tang to it that I just can’t match otherwise. Plus, the chill of the dough in a piping hot oven the next morning gives it a little extra boost in its spring to the heavens.
3. Boost Your Starter
Your starter is perhaps sad, and bored of the never-ending onslaught of being fed all-purpose white flour. I get it, it’s boring and lacks character.
Enter, rye. (Or *gasp* whole wheat).
There’s something *spicy* about rye flour. It’s got the finger-snapping, chicken strut attitude we all wish we could harness every once in a while. Anyways, rye or whole wheat flour has got gumption, and that’s what we need around here.
A little dash of rye will bring your starter a jolt of energy that it desperately needs. Instead of feeding your starter with your regular white AP flour, swap it out in equal parts for a day or two
Be sure to prep for overflow.
4. Waterbath That Baddie
The best oven spring I’ve ever seen comes from spritzing the tops of my loaves with just enough water to leave it glistening. I’m talking slow-mo, bachelor in paradise, sauntering on the beach glistening. Sexy.
I use a cheapy spray bottle from the dollar store to spritz tapp water onto my loaves after I’ve transferred them to their respective dutch ovens. Make sure to cut that loaf deep to allow for major spring action. Put the piping hot lid back on, and off to the oven she goes for the lid-on-bake portion.
5. You Gotta Hydrate
If you’re using whole wheat flour for your sourdough, you may find that it’s a little… dense. It may be really stiff dough, it likely won’t spring as much, and it probably lacks the big open crumb you’re after. (“Open crumb”, aka big holes and softer bread).
Low gluten flours are hard to work with, but their flavor is unmatched. Combat this by increasing your hydration levels, and mixing your flour with a stronger gluten white flour.
By increasing the hydration level, ever so slightly, your dough may be more difficult to work with but the end result is magically light fluffy sourdough.
Off to the Oven
Now that you’re armed with five new ways to make better sourdough, head over to the kitchen and get baking!
Sourdough is the ultimate equalizer–we grow and learn together. Sometimes we have an epic flop, and the chickens get a tasty snack. Other times, we have a hit that we learn to recreate again and again. (Fingers crossed you find the latter, faster). Cheers to better sourdough!
Bonus tip: make your own butter to slather all over your new and improved loaves. But how, Kate? I’ve got you covered. Read my easy-to-follow homemade butter guide.
Bonus BONUS tip (lucky you!): Let it COOL DOWN. I kid you not. I’ve cut to early into loaves that should have been text-book perfect, and they were goopy and the structure looked awful. Be patient and give it an hour if you can help yourself. You’d be surprised at how much better your loaves look and feel after they’ve had a chance to set up.
Okay, that’s it for now!
Will you try these tips? Let me know in the comments!